The support portal of Dropsolid
How do I log in to the support portal of Dropsolid?
To know which requests you've sent to support@dropsolid.com or to consult the status of your support tickets at Dropsolid, you must first log in to our support portal. Follow the steps below:
- Go to https://dropsolid.orbit.teamleader.eu
- Fill in your email address (and password) and click 'Next'
- You're now logged in to the support portal

How do I check my pending tickets in the support portal?
Easily track the progress of your tickets through our support portal.
- Log in via https://dropsolid.orbit.teamleader.eu.
- Click ‘Service Tickets’. You see an overview of your pending tickets.
- Via the column on the left, you can search by name, status, and priority.
- To track the interactions, click on a ticket.
- Add a comment to a ticket by entering a question or remark and clicking on 'Send'.


How do I add a new support ticket myself?
There are two ways to add a ticket:
- Send an email to support@dropsolid.com
The handling of the ticket will go completely via your own mailbox when you always reply to this mail. - Make a new ticket via our support portal
- Log in via https://dropsolid.orbit.teamleader.eu
- Click at the top right on ‘New ticket’.
- Add a subject and description to your new ticket.
- Upload any attachments by dragging the file into the comments box.
- Is your website no longer functioning? If so, set the priority to 'critical'.
- Click at the bottom on 'Ok', to submit the ticket.
- You will receive an email with every interaction that takes place.


I have an other question about the support portal
Don't hesitate to contact us via our contact form, via support@dropsolid.com, or via phone at the number 09/395.02.92.
Everything you need to know about reCAPTCHA
What is Recaptcha?
ReCAPTCHA is a CAPTCHA system that allows web hosts to distinguish between human and automatic access to websites.
If you experience a lot of spam in your mailbox or you want to secure your contact forms better, we recommend the reCAPTCHA module.
How do I use reCAPTCHA?
In order for the reCAPTCHA spam protection to function correctly on your website, you need to request the correct keys. This is how you do it:
- Log in with your Google-account
(Already have a Google Analytics account? You can use the same login details) - Surf to https://www.google.com/recaptcha/admin/create
- Add your website via ‘Register a new site’
- Label: website.be
Enter the name of your website - Type of reCAPTCHA: reCAPTCHA V2
- Domains: enter all domain names where your website appears (without HTTP://)
Also add the .dev and the .staging domain names. Not entirely sure? Request them via support@dropsolid.com
- Label: website.be
- Accept the ‘Terms and conditions’
- Click on ‘Register’

You will now see the site key and secret key. Please provide both in plain text (not a screenshot) to your Dropsolid contact person or via support@dropsolid.com.

How do I place a reCAPTCHA on my website?
Generate your site key and secret key with the help of our previous step and send them in plain text (no screenshot) to your Dropsolid contact person or via support@dropsolid.com

Everything about Google Tag Manager
What is Google Tag Manager?
Google Tag Manager is a tool that allows you to easily add and remove tags from your website yourself, without the intervention of a developer. Each tag is a piece of code from another program that measures events on your website. Examples are tags from Google Ads, Google Analytics and Floodlight.
How do I install Google Tag Manager?
- Surf to tagmanager.google.com and make an account.
You can also log in to an existing account. - A new container will be created by default, and you can easily create additional containers.
- Install the container on your website
Add the container frame following Tag Manager's instructions and remove existing tags. - Add your tags and publish them.
Note: a Tag Manager account is the highest organizational level. Usually only one account per company is needed. This account contains one or more containers. There are specific container types used for websites, AMP pages, Android apps and iOS apps.
How do I make a new account and add a container?
- Click on 'Accounts' → 'Create account' in Tag Manager
- Enter an account name
- Enter a descriptive container name
- Select the content type: web, AMP, Android or iOS.
- Click on 'Create'
- Read the terms and conditions and click 'Yes', if you agree to those terms.
- When your new container loads for the first time, it will ask for the code snippet for installing the web container. Install the code snippet immediately or click 'OK' to close the dialog box. You can always first set up your container and install the container snippet later.
How to add a new container to an existing account?
- Click 'Accounts' next to the appropriate account name in Tag Manager
- Choose 'Create container'
- Enter a descriptive container name
- Select the content type: web, AMP, Android or iOS
- Click on 'Create'
- Read the terms and conditions and click 'Yes', if you agree to those terms.
- Important: please also add analytics@dropsolid.com as admin of the container, so we can help you easily and quickly.
Everything about Google Analytics
How do I find my Google Analytics ID?
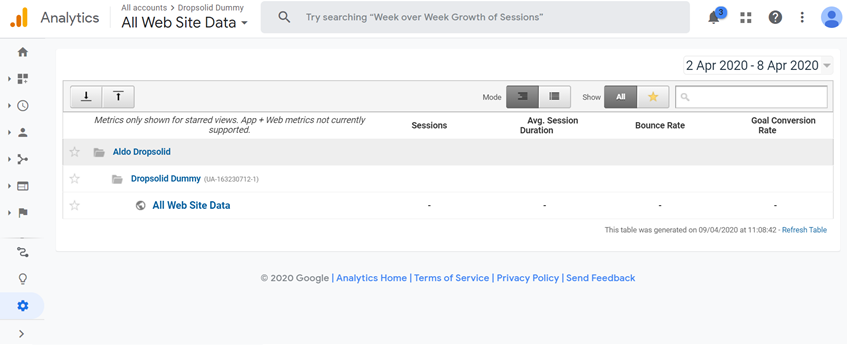
- Log in to your Google Analytics account and go to the homepage. You do this by clicking on the Google Analytics logo on the upper left.
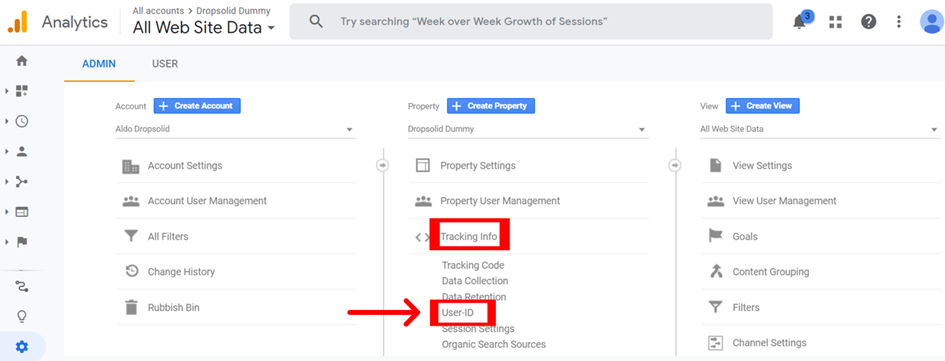
- Click on the bottom left on 'Admin'
- Click underneath the Property column on 'Tracking Info'.
- Click on 'User-ID'
- On the top, you can find your Google Analytics ID.

How to add a new user to Google Analytics?
- Make sure you're logged in to Google Analytics.
- Click on the bottom left in the menu on 'Admin'.
- Click on 'Account Access Management'.
- A window pops up with a plus (+) on the top right.
- Click on the plus and click on 'Add new user'.
- Fill in the email of the user you want to add.
- Check the correct rights.
- Click on the top right on 'Add' to validate a new user.
- Click on the plus and click on 'Add new user'.


Everything about Google Maps
How do I put my business visually on my website?
Google Maps is the perfect way to visually display your business location on your website. The location of your business will have a pin on the map. This pin should be in exactly the right place. To do this, you need to request the right keys via your Google account.
How do I add Google Maps to my website?
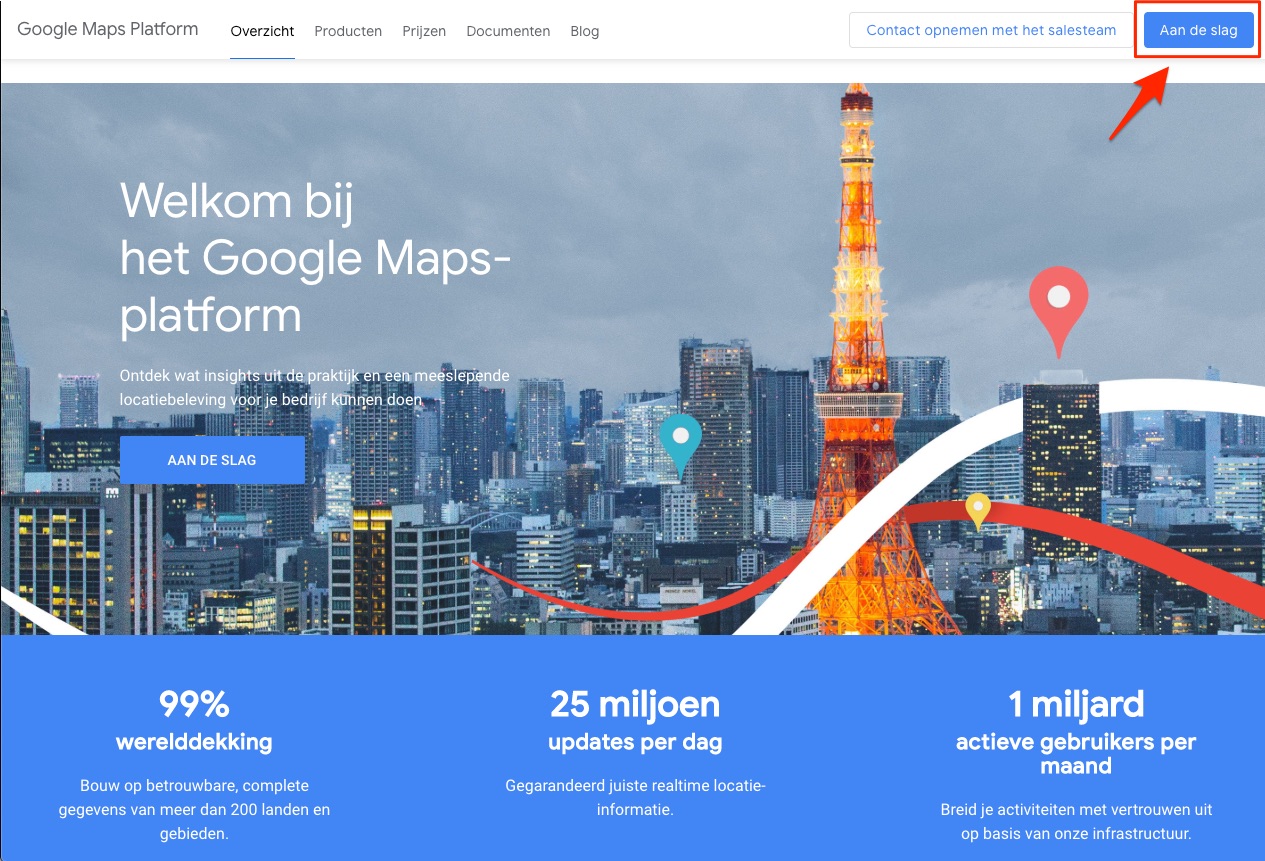
- Surf to https://cloud.google.com/maps-platform.
- Click on 'Get started'.
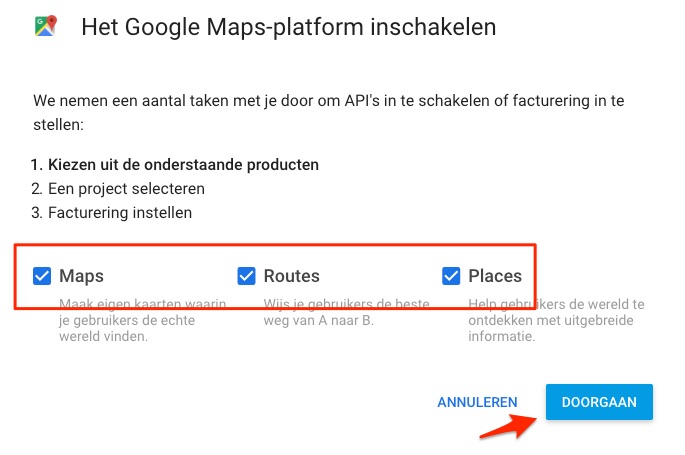
- A pop-up window will appear, check all three checkboxes and click 'Continue'.
- Sign in to your Google account.
- Not signed in yet? Then do so in the next step.
- Are you already logged in? Then this step will be skipped automatically.
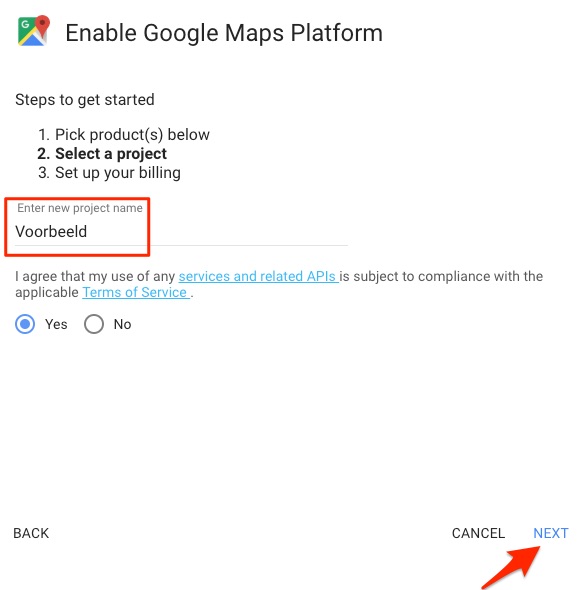
- Enter your project name and click 'Next'.
- Enter your billing information to use your free account.
- For your information: Each account gets $200 usage per month for free. This is normally sufficient for a basic website.
- More info can be found at https://cloud.google.com/maps-platform/pricing.
- You will now see the API key appear. Copy this key and pass it on to your Dropsolid contact or via support@dropsolid.com.
- Note: deliver this key in plain text, not in a screenshot.
- Surf to the Google Platform via https://console.cloud.google.com/apis/library and enable the following:
- Maps Javascript API
- Geocoding API

All done! If you still have questions, feel free to ask them via support@dropsolid.com.
How to add a map with multiple addresses?
- Make sure you're logged into Google.
- Go to Google Maps.
- Click on the top right on the hamburger menu (the three horizontal lines) to open the menu in Google Maps.
- Click on "My places" in the menu.
- Click on 'Maps'.
- Click at the bottom on 'Make map'. A new tab opens automatically. This is where you put your map together.
- Type in the search bar the address of the location you want to add to the map.
- When the address has a green pin, you click 'add to map'. The location is now added to your map.
- To add the next location, type again an address in the search bar. Click on 'Add to map'.
- This way, you can add as many locations as you want to your map.
- You change the name of your map by clicking on the three dots 'Nameless layer'. Next, you select 'Change name of layer'.
- When you've added all of your locations, share them by clicking on 'Share' in the menu. You name the map and give a description if desired.
- In the 'Sharing'-window, change the access so everyone can see the map.
- Go to 'Who has access', click on 'Change...' and select 'On, public on the internet'.
- Last, you have to copy the code to add the map to your website.
- Click in the menu on the three dots. Next, click on 'Include on my site'.
- Copy the code that appears, and add it to your website.
Everything about browsers, hacking and integrations
Which browsers does Dropsolid support?
We support the latest, and the major version before that one, for a list of modern browsers.
Find out more on our documentation site.
How do I empty my browser cache or clear my cookies?
Everything about Dropsolid Experience Cloud
I have a question about Dropsolid Experience Cloud
You can find all our information about Dropsolid Experience Cloud on this website: https://support.dropsolid.io.